
Main Menu


Views: 1916
TONEX REVIEW
AI Machine Modeled tone creator, player, browser
TONEX by IK Multimedia
Review by Howard Worf for guitaristguild.com
Guitarist Guild would like to thank IK Multimedia for providing the licence to enable us to complete this review.
All of the opinions expressed in this review are mine and mine alone.
So another exciting launch from IK Multimedia – at least I think so. Can't afford a hardware modeller, but have a laptop and audio interface? This is where you go.
INTRODUCTION
First a few bits of technical stuff:
What you will need (other than a guitar, amp and computer of some description):
- An audio interface with at least two inputs (one Hi Z for your instrument) and two outputs.
- A decent microphone or 2
- A monitoring system of some kind, preferably full range with a flat response curve (FRFR).
- A Re-Amplification box if you need to match the output of your interface to amp input.
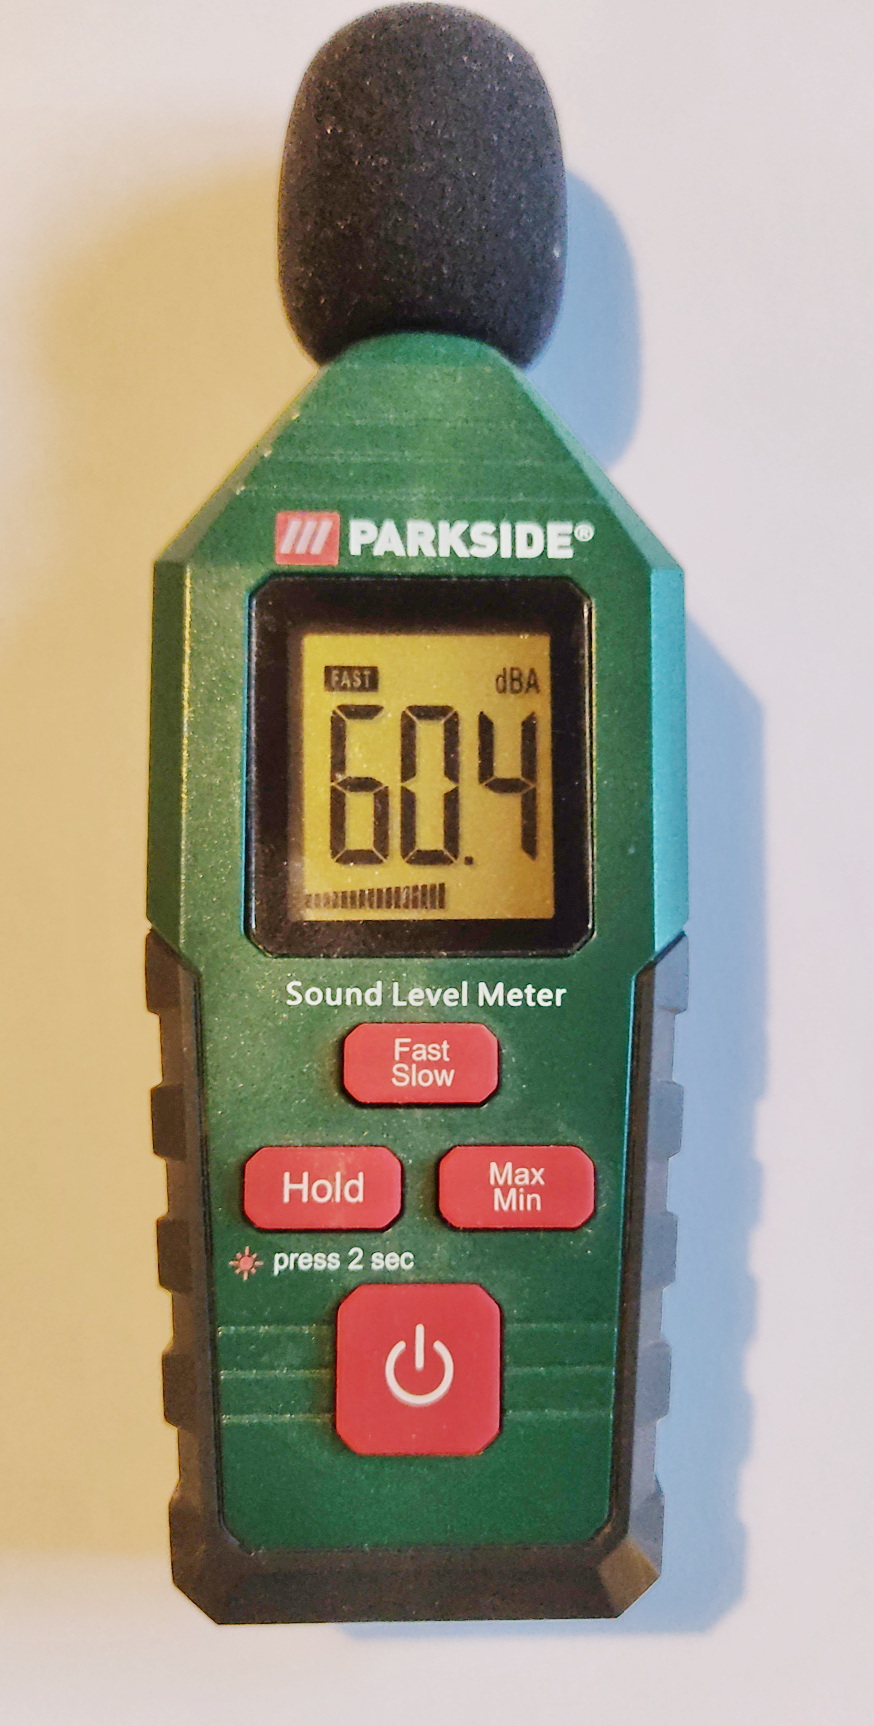
- Not on the list provided by IK Multimedia, but a decibel meter looks like a very useful if not essential addition to the equipment list for using the modeller.
Mac/PC/iOS for iPhone/iPad
Stand alone, VST, AAX for your DAW
Has it's own unique tone modelling
CS version 20 tone models -10 amps, 5 pedals
SE version 200 tone models -20 amps, 10 pedals
Standard 400 tone models – 40 amps, 20 pedals (at time of writing same price as SE version)
Max version – 1000 tone models, 100 amps, 50 pedals
No time based modulation available (reverb, delay, phaser, flanger etc)
Integrates with the latest iteration of Amplitube 5 (5.5.2)
Captures and models your own rigs, more of which later
Will only capture tone, so don't think about modelling any reverb, delay, phaser, flanger or anything of that ilk
To find a Tonex modelled amp in Amplitube select the Amp rack and scroll to the bottom, for a Tonex stomp choose the stomp rack (make sure you have the latest versions of both Tonex and Amplitube) and do the same. Tonex will now load.
CONCLUSION
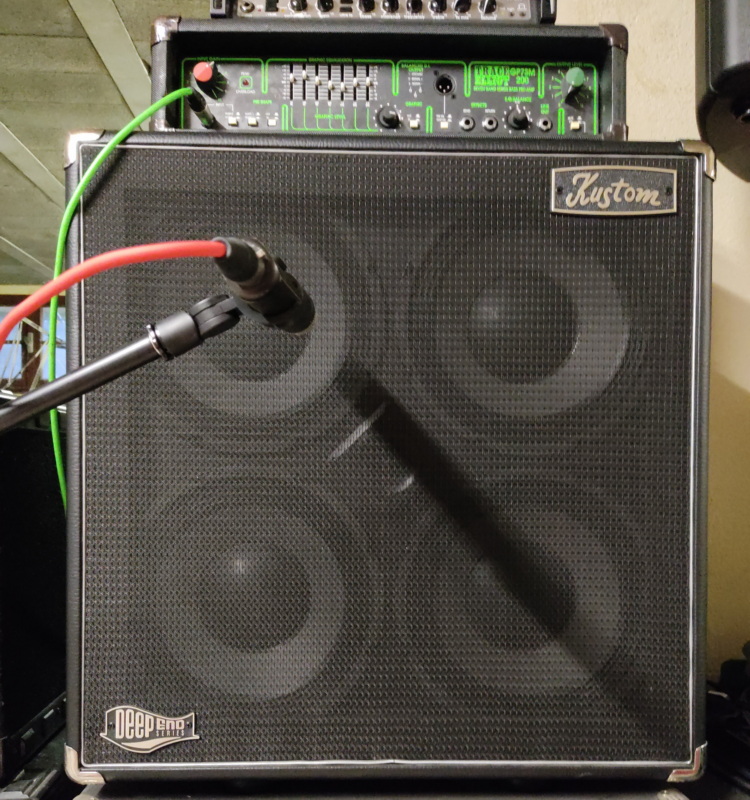
I for one am ecstatic – I have been able to model the response from my favourite bass amp, an old Trace Elliot GP7SM200, and it's perfect. I've also captured some of my favourite tones from my Fender Mustang V2 and Zoom G3X. Processing a capture does take quite a while on my laptop (several hours) but the result is worth the wait. In a word, the models are astonishingly good.
Like all IK Multimedia's guitar software the library of sounds it is a lot of fun and delivers realistic tones. The included presets tend to be towards to the heavier end of guitar sounds. The clean tones are equally impressive even if clean tones can, in my opinion, almost always benefit from at least a little modulation which Tonex alone cannot provide. That said the reverb is extremely good. But you probably won't be using this as a stand alone application when recording, either running the tones through Amplitube 5 or your favourite DAW.
Once you have created a captured tone you cannot really alter it – so take care about the tones you map. My gut feeling is that it is best to just model the amplifier and cabinet, adding your preferred stomp boxes into the signal chain when playing either physically or through Amplitube, rather than model a particular stomp effect which you will not be able to alter in performance. There is, of course, nothing to stop you modelling just about any (non modulated) sound you can create with your physical gear.
The $64k question is should you buy this software? I think the answer has to be that if you are happy with Amplitube 5 and don't want to capture any additional tones you probably should not. Amplitube 5 is extremely versatile and customisable and will probably be all you need. But . . capturing and then being able to replicate your own tones anywhere is simply brilliant and once you have started you won't want to stop.
GETTING STARTED
You will need IK Multimedia's Product Manager. If you have any other IK Multimedia's products make sure they are all up to date. Tonex will only integrate with the latest version of Amplitube. You might wish to update Amplitube 5 after you install Tonex – there is some suggestion on the web that doing it the other way around won't work, although it did for me. Installing on my Windows 10 laptop involved having to go to the download temp file and run the installer as administrator.
The style of the UI will be familiar to you if you have used Amplitube, the same dark greys and white text. By default the application opens with the Audio settings/account/info window. The audio setting options I found a little strange.

If I chose the windows audio option from the Technology drop down menu the ASIO interface appears as an option, but the interface itself does not, just generic ASIO.

If instead I chose ASIO then with the Behringer the input device is automatically the UMC ASIO driver.
The default buffer size for my systems is 512 which works. I did experiment with 256 and that seemed to work well too. But there was nothing much to be gained from doing so. So I stuck with the default 512 and left it at that.
GETTING SOME TONES
After setting up your audio interface you'll want to start exploring the tones. Thanks to ToneNET these are legion, although the max pack come loaded with more than a thousand models
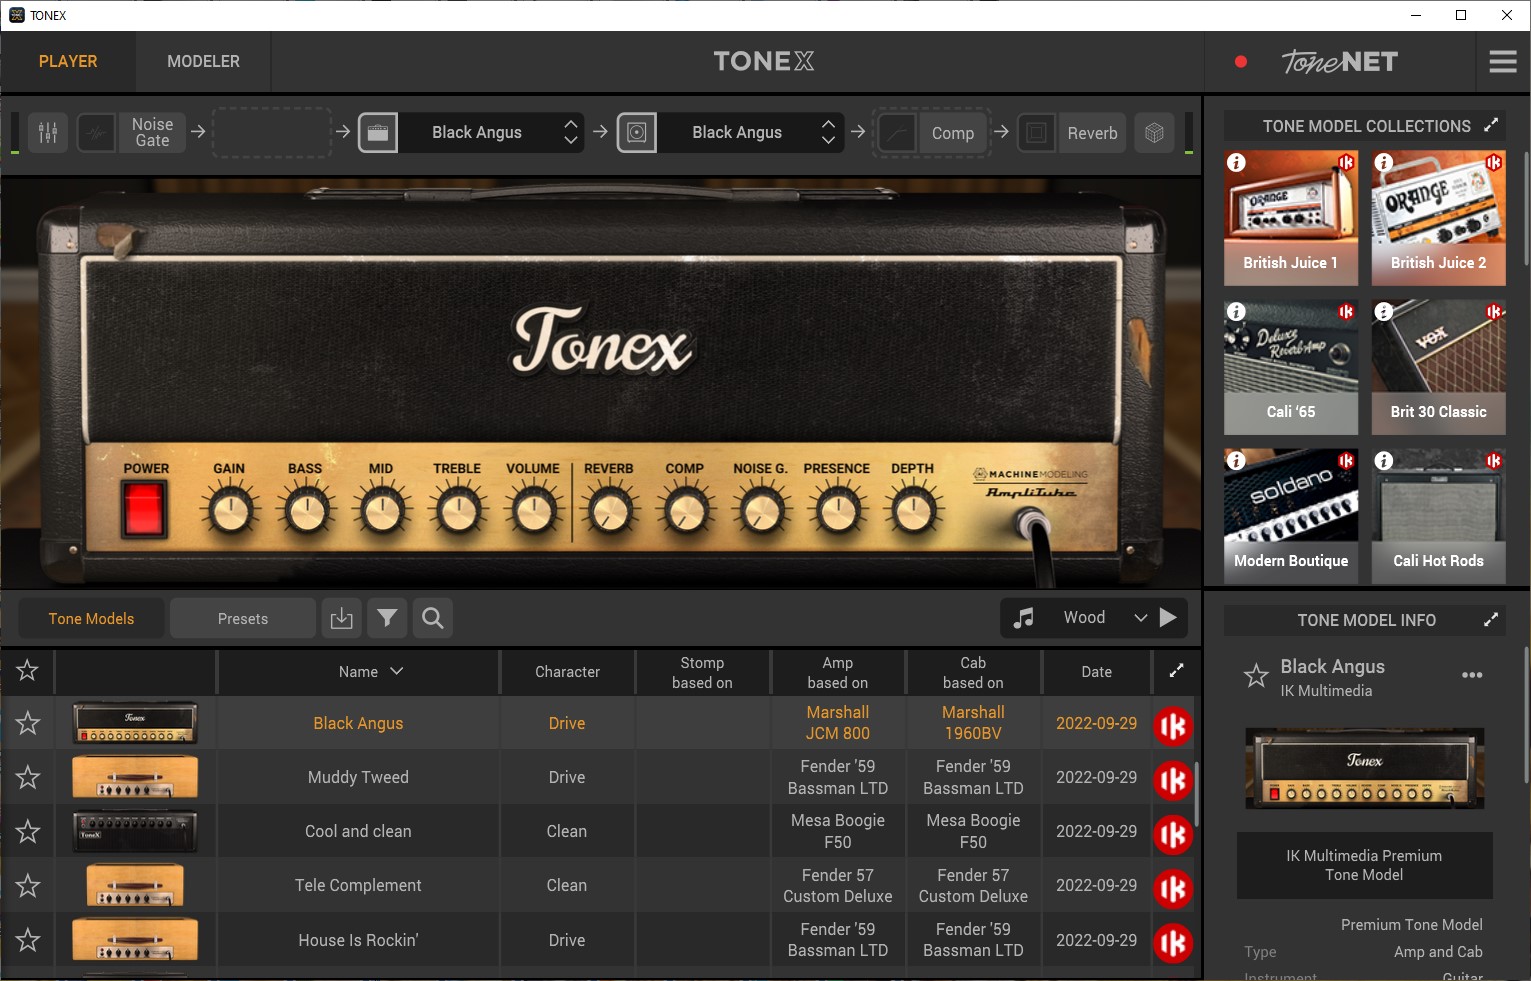
When you open the app you are using the start up tone based on a Marshall JCM800. What's not to like?
- Filter using the funnel symbol and choosing the features you want to see.
- Search directly using the magnifying glass symbol
- Sort any of the columns into alphabetical order
- Show only your favourites
TONE MODELS
Tone models are just that – the unadulterated models. The descriptions are self evident so I shall not dwell on the various columns, except to say that the first column is where you can mark favourite tones, making them easy to recall the ones you like the most. In the top right hand corner you can see the Tone Models Collections window. There are a lot more than the 6 you can see – scroll down for loads more. Very helpful as a starting point navigating the huge choice and variety of tone models available.
Beneath that is a window giving the details of the tone model.
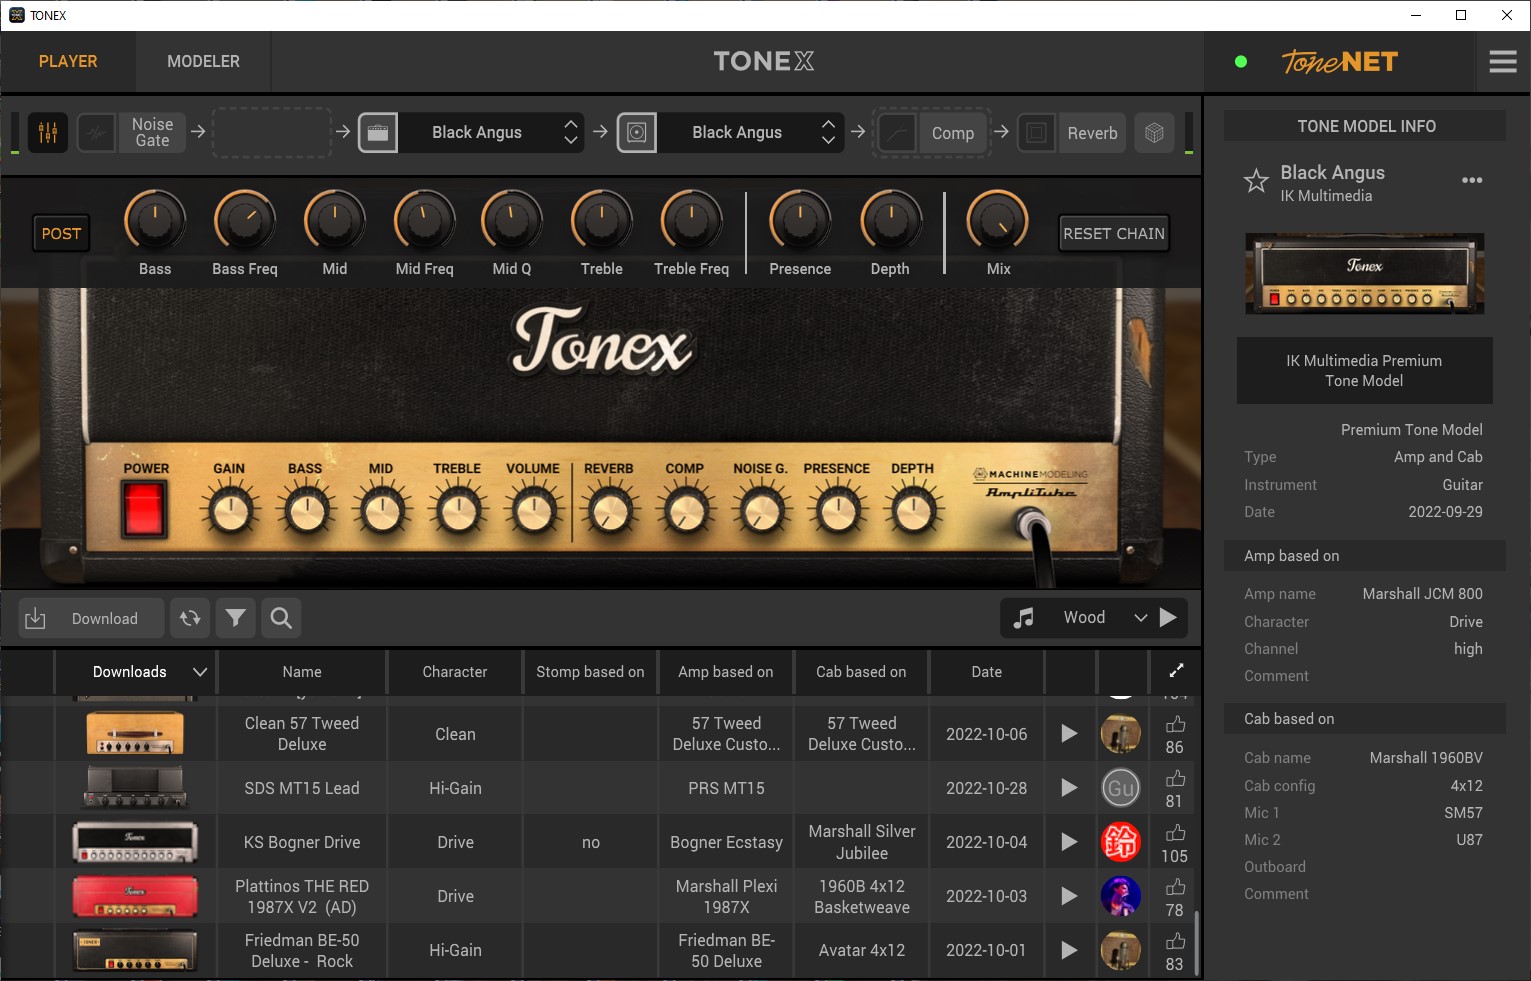
The top bar contains controls for the EQ, noise gate, amp model choice, cab choice, compression, reverb and microphone choice and placement. Note that there is no window for stomp – in the Tone Models window stomps cannot be changed. The elements that are active for each model or preset are shown in white. Play with these as you wish, turn them on and off, alter the parameters.
The effects signal chain will change depending upon whether the EQ and/or compressor are set to pre or post relative to the tone module (amp and cab). The noise gate is always at the start and reverb always at the end.
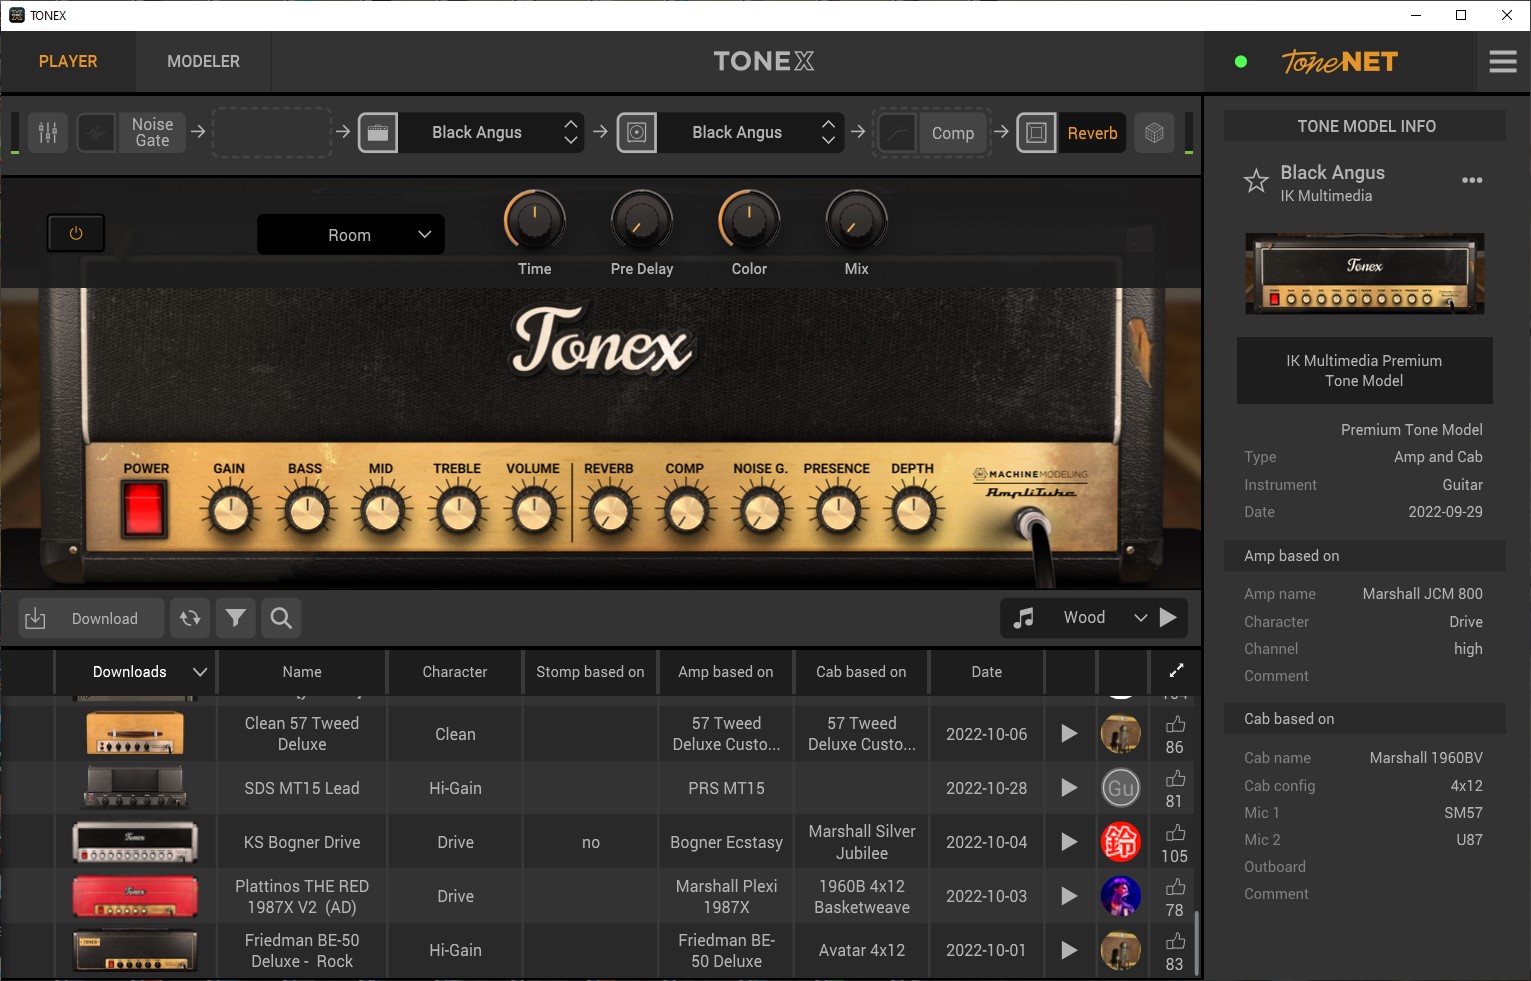
At this juncture I would like to say how excellent I found the reverb to be: smooth, open, very realistic – a gem. You can, of course, save any changes you make (open box with down arrow next to the Presets button) but note your modified tone becomes a preset.

A couple of screenshots of the controls for the EQ and the reverb:
PRESETS
This is the other tone area. These are modelled tones with various tweaks. Again the signal paths are altered by setting EQ and/or compressor to pre or post the amp and cab. The window is a little different from the Tone Models window, in the that second column now shows the preset signal chain. You can modify the effects chain in the same way as with the tone models. The search functions are the same. Again, you can favourite the tones you like the best in order to load them quickly again.

TONENET
This is IK Multimedia's huge online tone and preset library for both Tonex and Amplitube 5. I will not go into detail here other than in how it enables you to share your modelled tones with the world and download and use the thousands of others provided by the community of users. You connect by clicking in the ToneNET box and when you have a successful connection the red indicator turns green. You can now exchange tones with the world. Downloaded tones are added to your local library.
MODELLING
Let's face it, this feature is most likely the reason why you are are interested in Tonex.
It's quite a process, but the UI guide is very clear, just make sure you read it carefully as you go along. Here is how it works:
You MUST have
- A guitar or bass
- An amplifier
- A speaker cabinet (or both in a combo)
- A computer (or iPad/iPhone – I do not have either so can't comment on their functionality)
- An audio interface with at least 2 inputs and 1 output – I used a Steinberg UR22 for modelling with my laptop (I did not always use my re-amp box and could not tell much, if any, difference in the resulting tone models with my old ears)
- A decent microphone or two
You might like to have
- A decibel meter – Amazon sell one for less than €30. For this use it does not have to be a calibrated meter. Mine was from Lidl (I couldn't find my calibrated one).
- A re-amplification box to match input to your amp. Tonex Capture from IK Multimedia is €299 including VAT, including Tonex SE (on it's own €179.99 including VAT) with 200 tone models. The Palmer DACCAPO is €79 from Thomann.
- A DI box if you aren't using a microphone or a DI output from your rig.
- A boom microphone stand or two
Having gathered your items together there is some wiring to be done.
Connect your interface to your computer and make sure that you have selected the correct audio device from the Tonex audio interface page. If you can't see it, click on the 3 horizontal lines to the right of the ToneNET logo in the top right of the UI.
Set up your guitar and amplifier/cabinet and place your microphone or microphones (if using more than one your interface has to have 3 input channels).
Play your instrument through your rig as usual and measure or gauge the volume – this is important and not mentioned in the instructions until you are some way through the process.
Open the Tonex Modeller
You will see the welcome screen – click next and you will have the choice of guitar or bass as source.
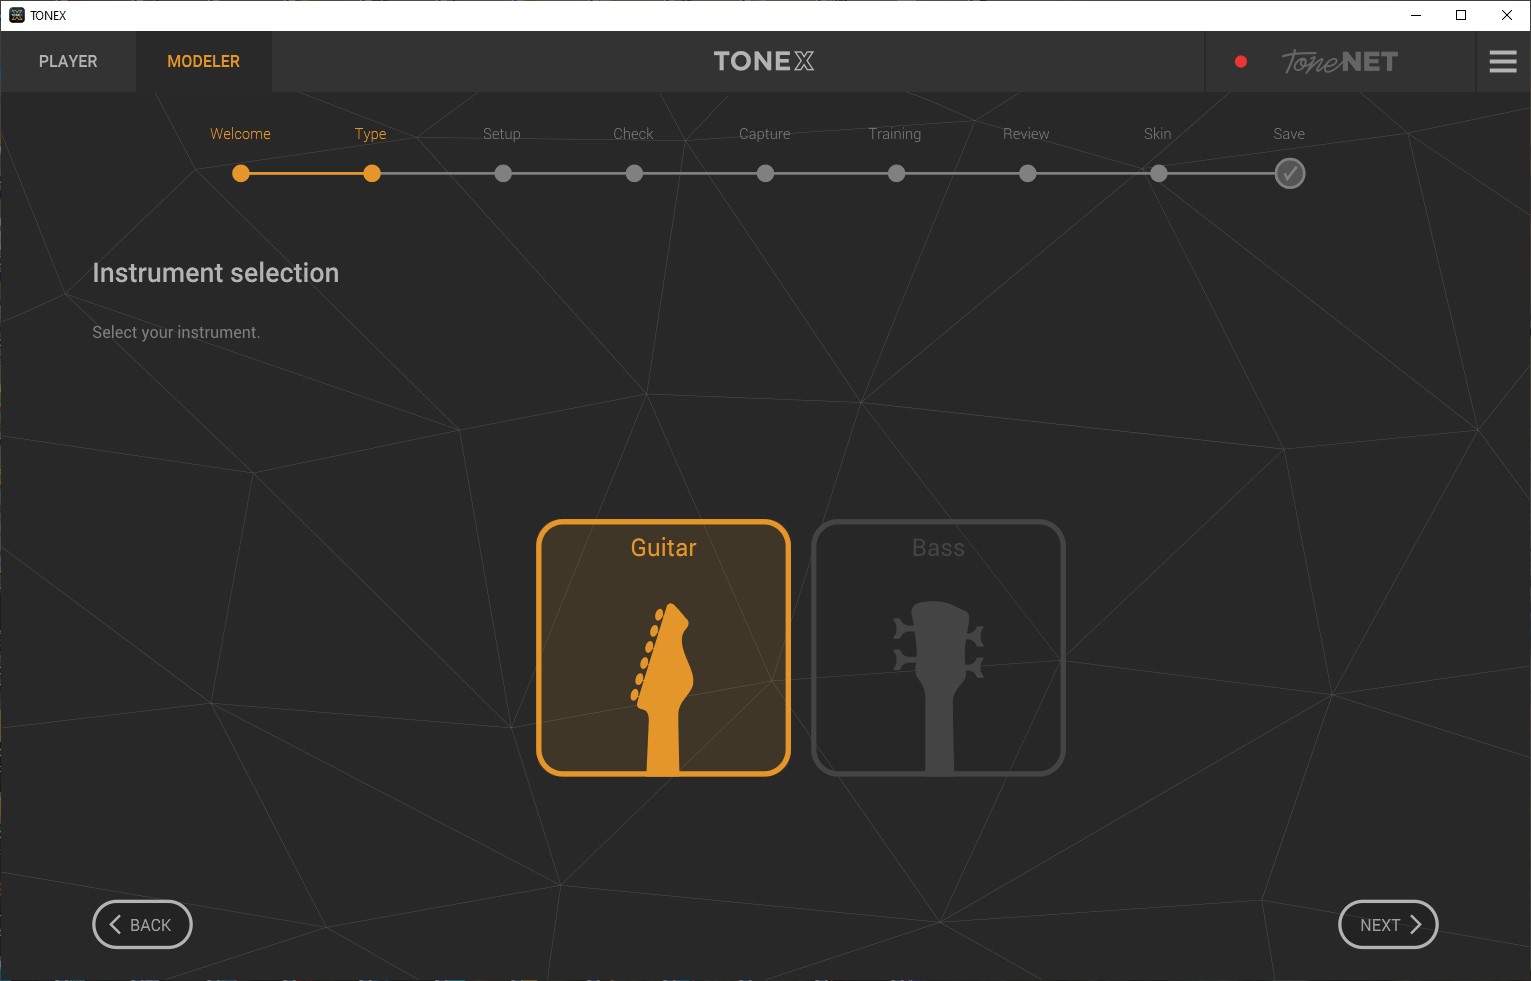
Make your selection and then move on to the next screen.
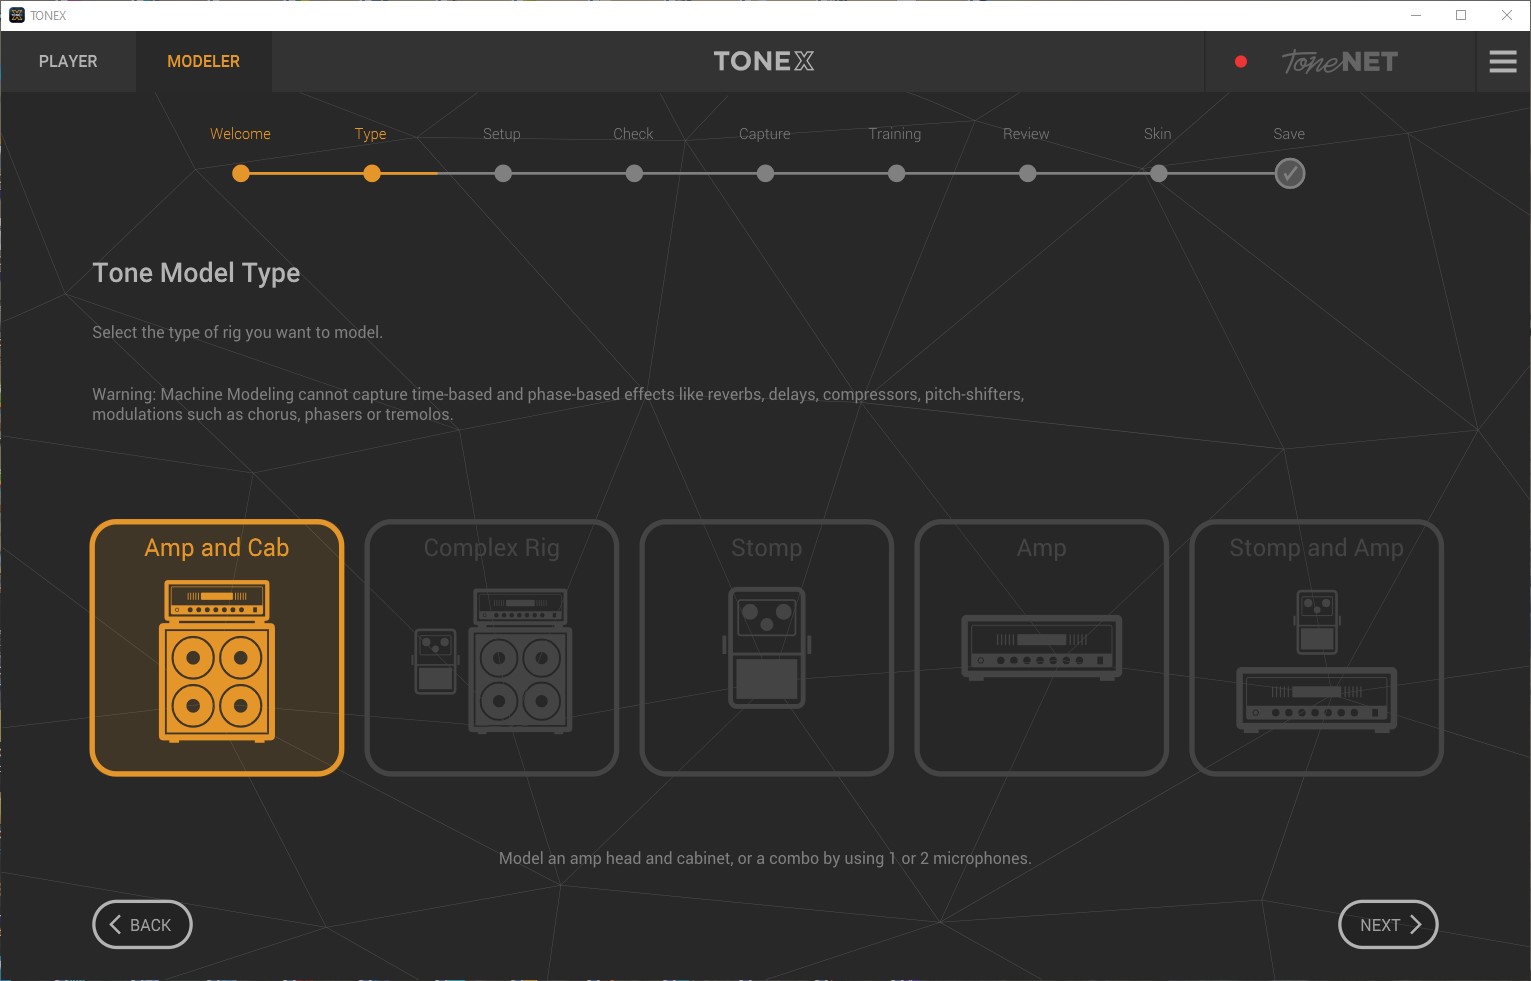
The next page asks you select your rig. Self explanatory.
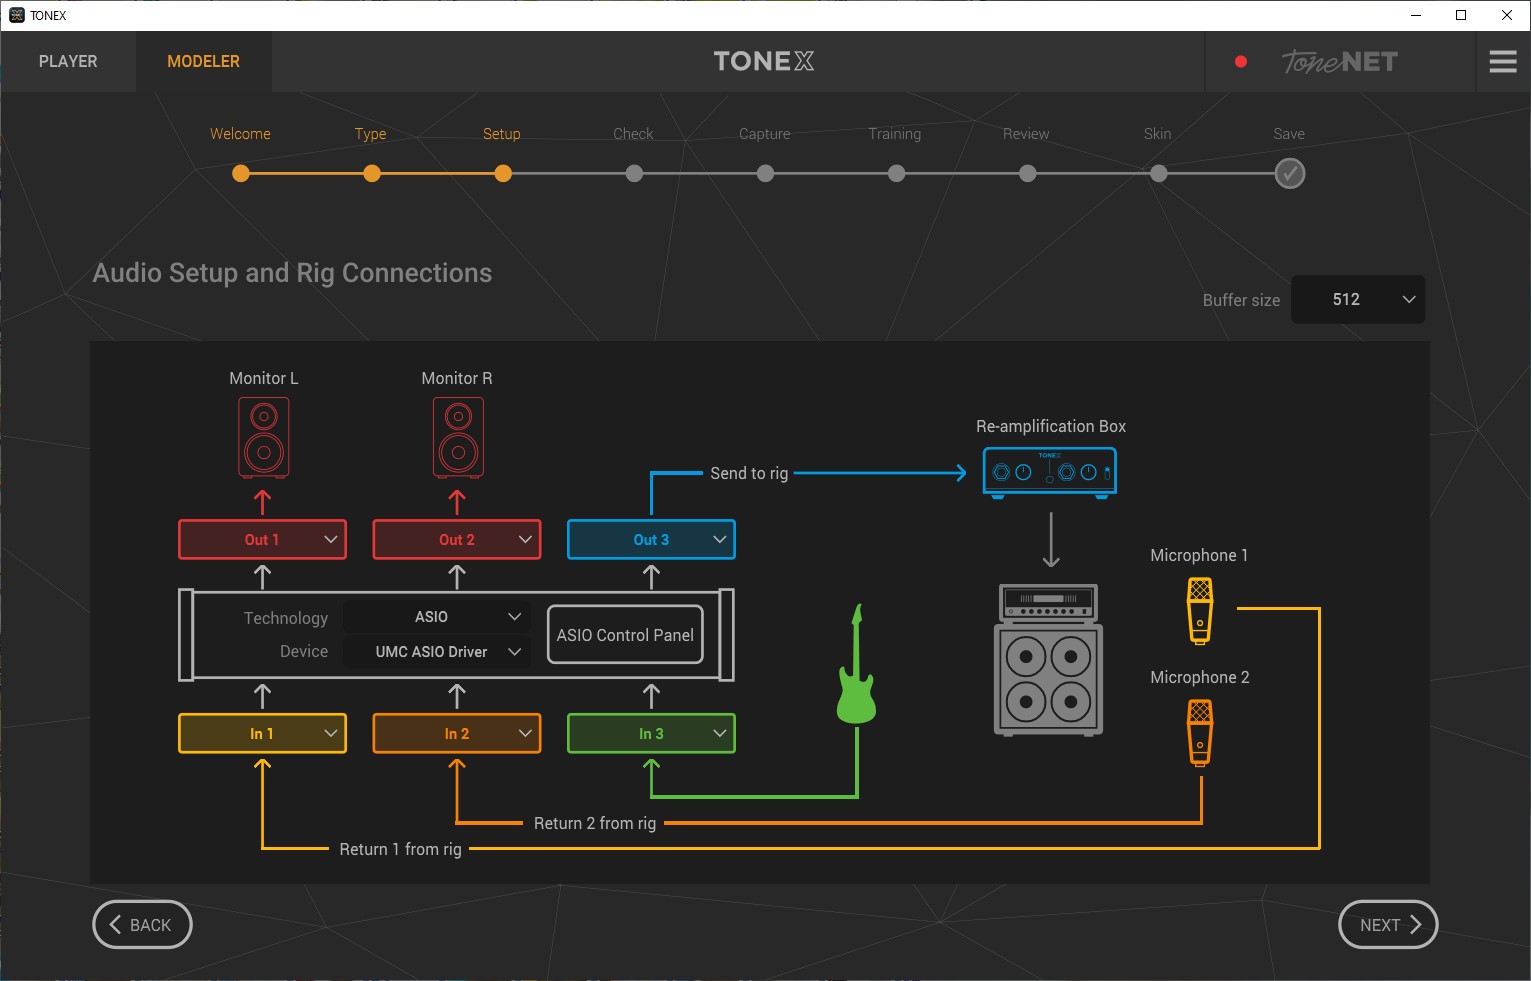
In the next window – setup you tell Tonex about your signal path – which inputs you have the microphone and instrument plugged into, which outputs are going to the monitors and which output is your return to rig. I did not always use the re-amplification box and if you don't just imagine that the send to rig path is only going to the input on your chosen rig. Example UR22:
Example UMC404HD:
Next up is setting the instrument input level. Note the direction to use a Hi-Z input. If your guitar or bass is active you may have to use a pad cut. I found this was not necessary using my interfaces as there was sufficient headroom in the Hi-Z gain controls.

Play your instrument to set the input levels. The meter will turn red if the levels are too high.
On the next page you have to set the send level to your rig (via the interface output and/or re-amplification box) to match the levels you get when playing directly through your rig. Hence my suggestion that you start by playing your instrument through your rig and establishing the volume level – I found the decibel meter to be invaluable for this.
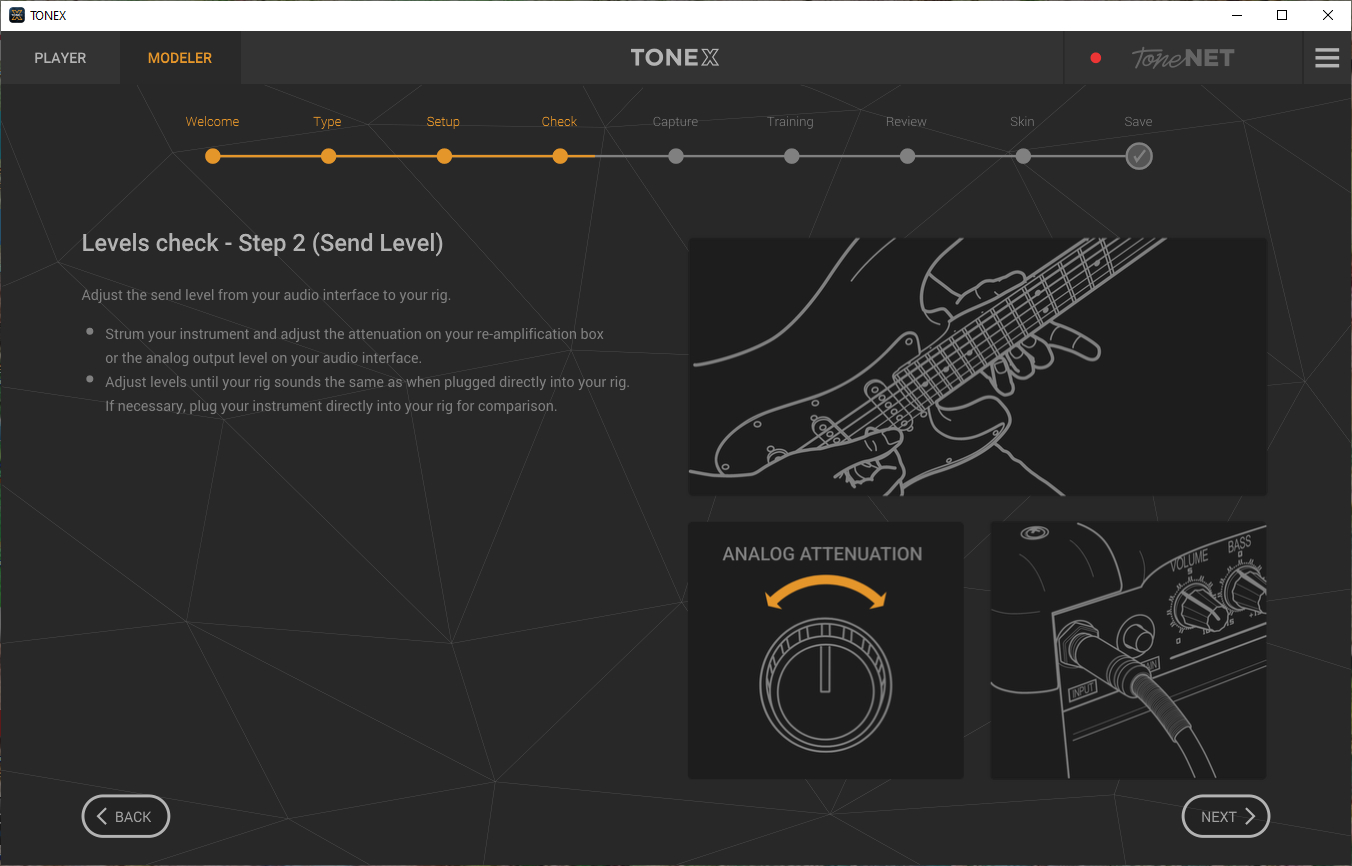
(As an aside, I found that I couldn't model DI direct from Ampeg's DI out – high noise levels reported that would affect the accuracy of the model, so I miked it up instead)
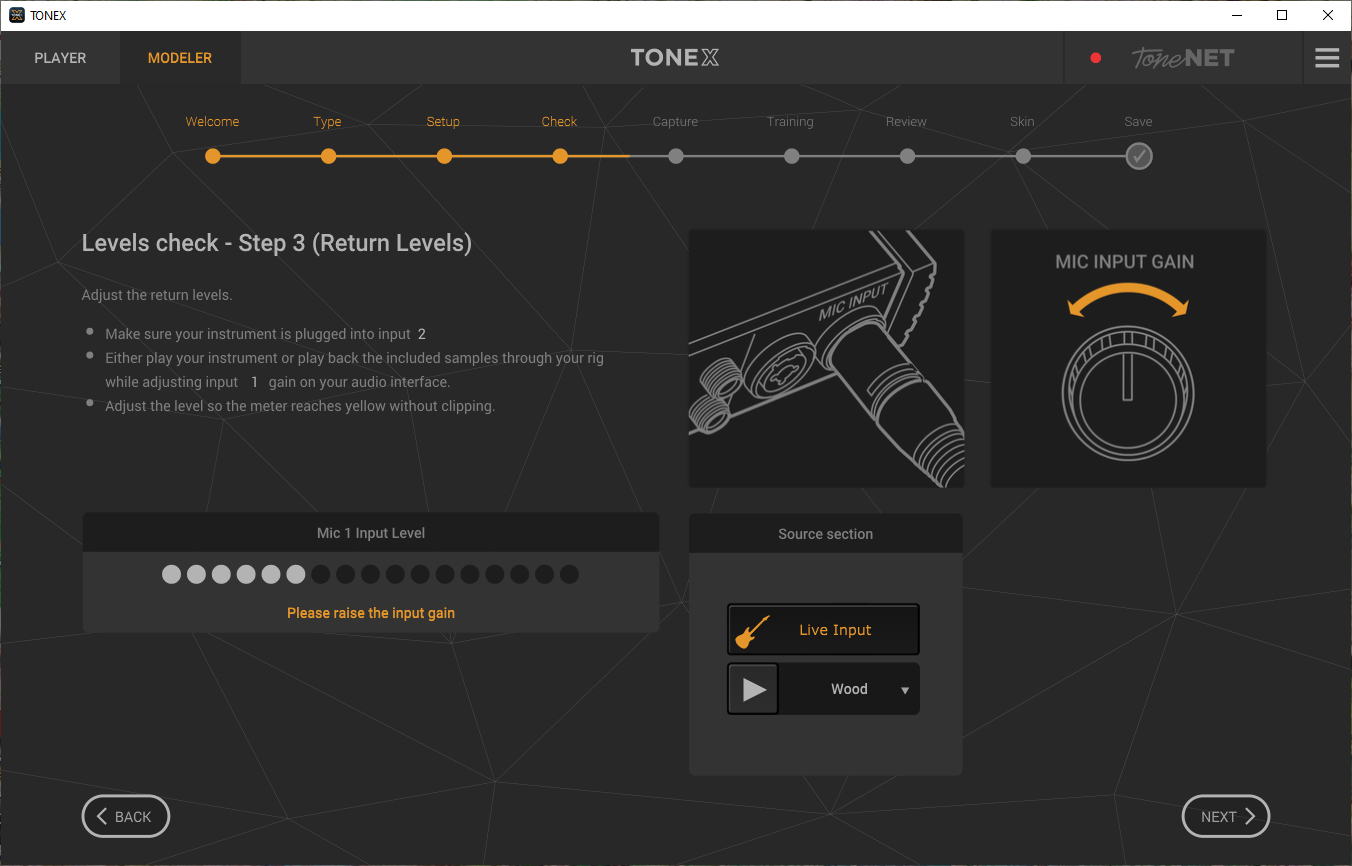
The next page is the return levels, the levels coming into the interface from your microphone(s). Here I suggest that you use one of the installed samples from the drop down box. For guitar I used 'space' and for bass 'bass'.
Having set the return levels you move onto capture.

Click the 'capture' button and Tonex will start playing its modelling tone set through your rig. As it does so the capturing process circle will advance clockwise filling with green until the capture is completed.
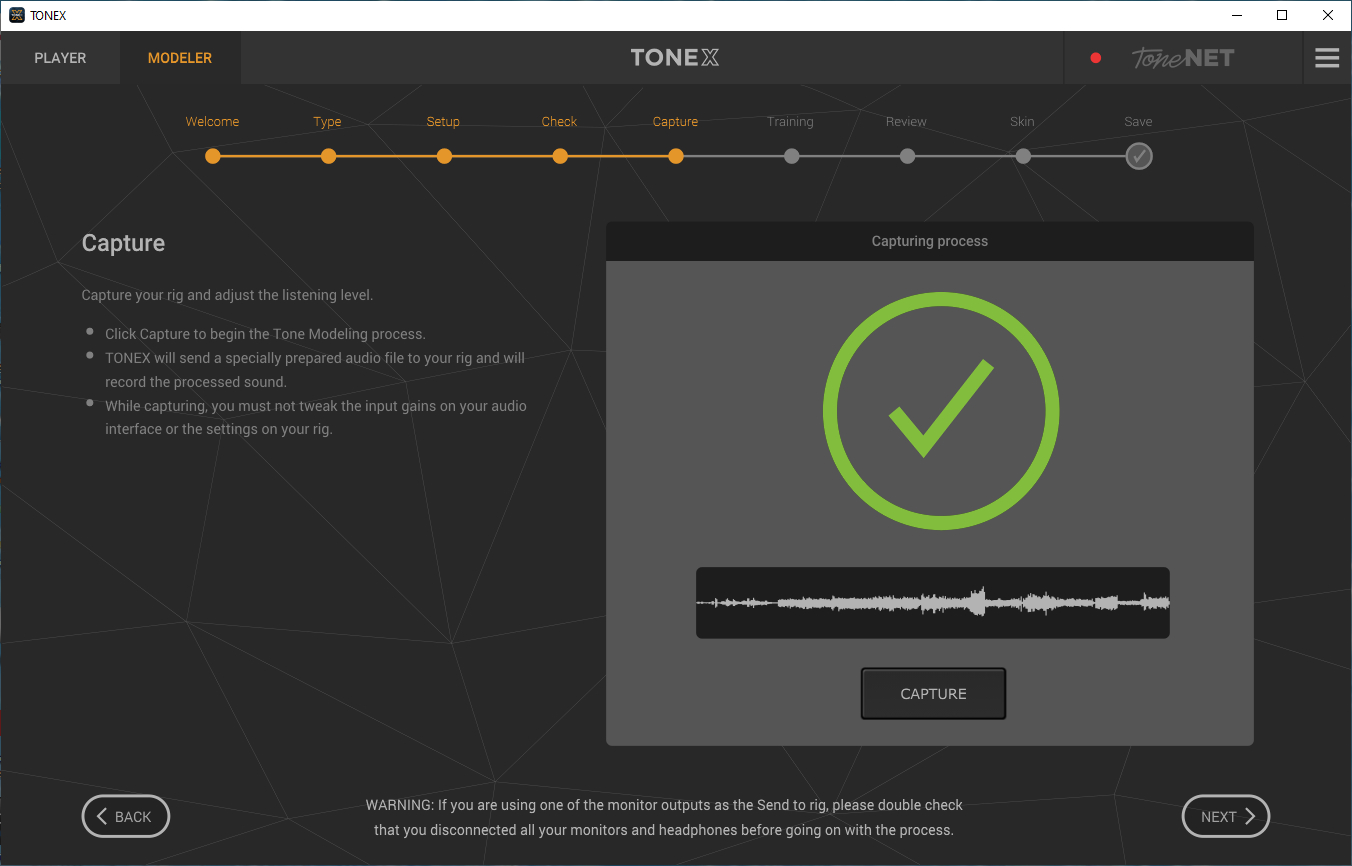
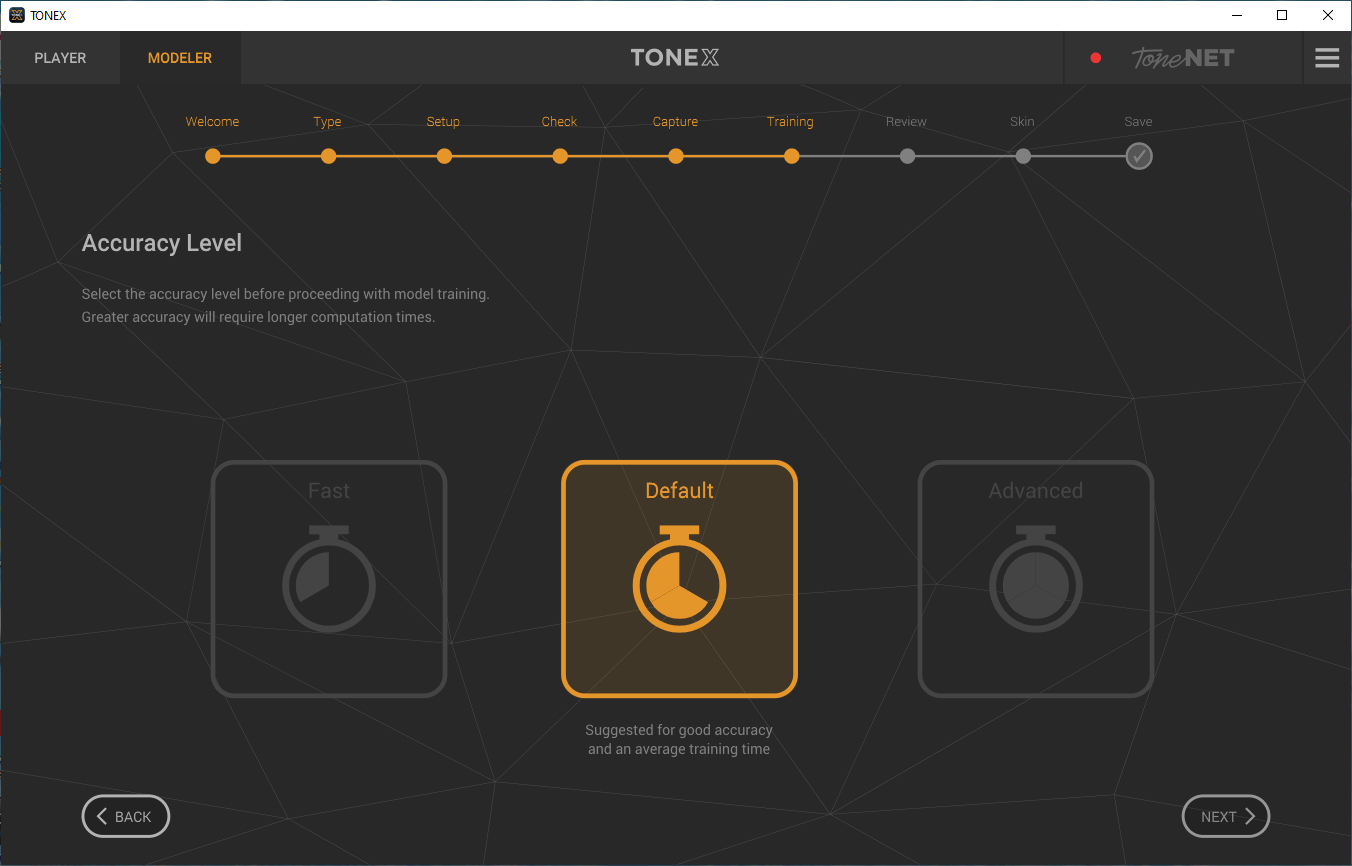
The AI will run,

and when completed you will see this window:
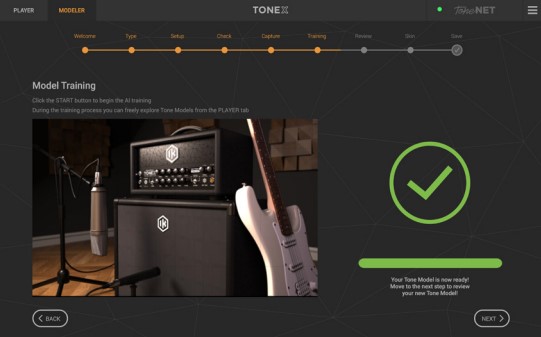
With the AI training has finished you can audition the newly created model before saving it. You might have to remove the connection path that goes from your interface to the amplifier and replace it with a path to your monitors – as below with the UR22.


The last thing to do is to save your model. Here is a screenshot of the page for saving one of my favourite tones from the venerable Zoom G3X:

Click on save and go to the player. Enjoy your new sound.
If you are so inclined you can now upload this to ToneNET – choose an appropriate demo sound – I use 'space' for guitar and 'bass' for bass. The choice is yours.
You can play with some of the tones I created for this review by opening ToneNET and searching for 'H the Bass'.
Things used in this review:
PCs: 9 year old desktop AMD FX8, 16gb ram, laptop ASUS VivoBook 15, 6gb ram
DAWs – Cubase Pro 11 (12 won't run on my old desktop), Studio One 5 Professional, and Reaper 6.71
Monitoring – Behringer Truth B2031A near field, AKG K240 headphones
ASIO Interfaces – Steinberg UR22, Behringer UMC404HD
Re-Amplifier – Palmer DACAPPO
DI Box – Behringer DI 100 Ultra DI
OS – Windows 10 Home
Amplifiers – Combos: Fender Mustang 3 V2, Fender Champion 100 2x12, Heads: Ampeg Portaflex 500, Trace Elliot GP7SM200
Cabinet – Kustom DeepEnd 4x10
Guitars - Epiphone Prophecy GX, Schecter Banshee Diamond Extreme, Schecter Omen 6, Harley Benton Fusion Pro ll HH, Ibanez SG300EB, and Marcus Miller M7 V2
PA – Mixer (run flat) Behringer PMP6000, and the Box PA302s.
CONCLUSION
I for one am ecstatic – I have been able to model the response from my favourite bass amp, an old Trace Elliot GP7SM200, and it's perfect. I've also captured some of my favourite tones from my Fender Mustang V2 and Zoom G3X. Processing a capture does take quite a while on my laptop (several hours) but the result is worth the wait. In a word, the models are astonishingly good.
Like all IK Multimedia's guitar software the library of sounds it is a lot of fun and delivers realistic tones. The included presets tend to be towards to the heavier end of guitar sounds. The clean tones are equally impressive even if clean tones can, in my opinion, almost always benefit from at least a little modulation which Tonex alone cannot provide. That said the reverb is extremely good. But you probably won't be using this as a stand alone application when recording, either running the tones through Amplitube 5 or your favourite DAW.
Once you have created a captured tone you cannot really alter it – so take care about the tones you map. My gut feeling is that it is best to just model the amplifier and cabinet, adding your preferred stomp boxes into the signal chain when playing either physically or through Amplitube, rather than model a particular stomp effect which you will not be able to alter in performance. There is, of course, nothing to stop you modelling just about any (non modulated) sound you can create with your physical gear.
The $64k question is should you buy this software? I think the answer has to be that if you are happy with Amplitube 5 and don't want to capture any additional tones you probably should not. Amplitube 5 is extremely versatile and customisable and will probably be all you need. But . . capturing and then being able to replicate your own tones anywhere is simply brilliant and once you have started you won't want to stop.
System Requirements
TONEX for Mac/PC
TONEX for Mac/PC is a 64-bit application and requires a 64 bit CPU and Operating System.
Mac®
Intel: Intel® Core™ i3 (Core i5 recommended for Modeler), macOS® 10.11 (macOS® 11 Big Sur required for Modeler), 4 GB of RAM, 6 GB of hard drive space
Apple Silicon: Apple M1, macOS® 11, 4 GB of RAM, 6 GB of hard drive space. TONEX is a native Apple Silicon application.
Supported Plug-in formats : Audio Units, VST 2, VST 3, AAX.
Windows®
Intel: Intel® Core™ i3 or equivalent CPU (Core i5 recommended for Modeler), Windows® 10, 4 GB of RAM, 6 GB of hard drive space, NVIDIA GPU with Maxwell or newer architecture is recommended to reduce training times (eg. GeForce GT 750 or higher).
Supported Plug-in formats (64-bit): VST 2, VST 3, AAX.
Internet connection is required to authorise the application and access ToneNET.


About the author
Hinfrance registered at Guitarist Guild: A Musical Community Beyond Strings on November 21, 2012, 08:31:34 AM and has posted 332 posts in the boards since then. Last visit was August 22, 2023, 08:26:58 AM.
Articles in « Gear Reviews »
Guitarist Guild is a participant in the Amazon EU Associates Program, an affiliate advertising program designed to provide a means for sites to earn advertising fees by advertising and linking to guitaristguild.com